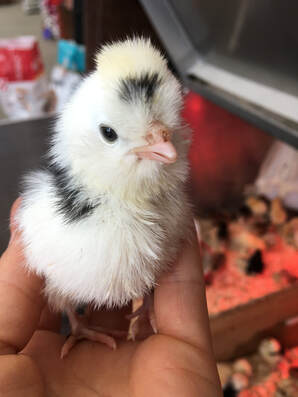
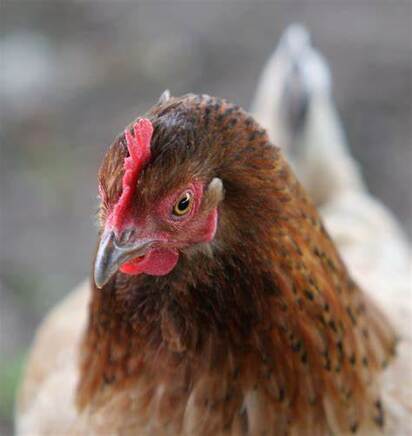
Getting new chicks or preparing to start a flock? Caring for your new birds can look daunting, but with some cleanliness and a little common sense anyone can do it! |


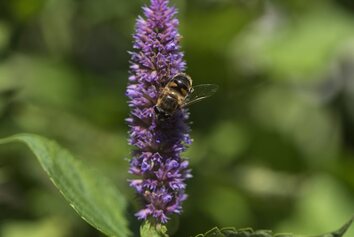 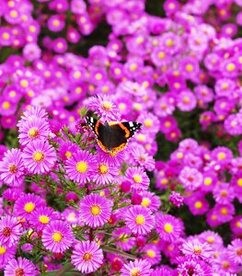 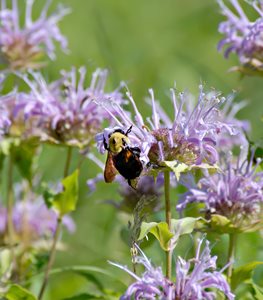 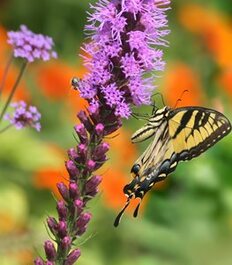 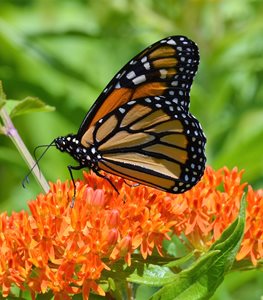 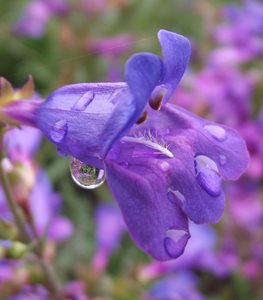 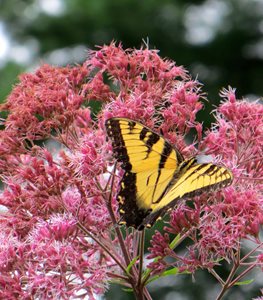 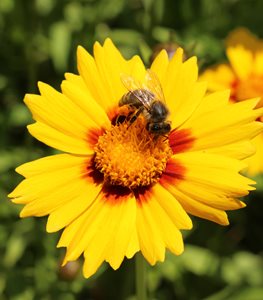 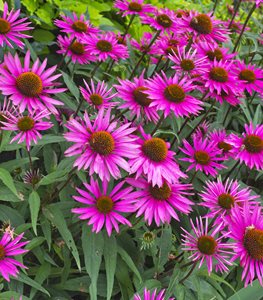 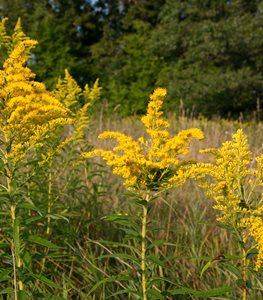 | ANISE HYSSOP (Agastache foeniculum) Zone: 4-8 Height: 2 to 4 feet Bloom time: June to September Flower color: Lavender to purple Honeybees love feeding on the super-sweet nectar of hyssop’s densely packed flowers, making it a favorite plant for beekeepers. ASTER (Symphyotrichum spp.) Zone: 3-10 Height: 1 to 4 feet Bloom time: August through October Flower color: Purple, violet-blue, pink, white An important late-season food source for native bees and may also help sustain monarch butterflies during fall migration. Native varieties are the best choices for pollinator gardens. BEE BALM or WILD BERGAMOT (Monarda fistulosa) Zone: 3-9 Height: 2 to 4 feet Bloom time: June to September Flower color: Lavender, pink, white This pollinator superstar has pompom like clusters of tubular flowers that are irresistible to native bees and bumblebees. It has also been identified as a valuable nectar plant for monarchs, according to The Xerces Society. BLAZING STAR (Liatris spicata) Zone: 3-8 Height: 3 to 6 feet Bloom time: Mid to late summer Flower color: Purple, white, rose This native prairie plant will bring a pageantry of butterflies to your garden, including monarchs, swallowtails, and painted ladies. MILKWEED or BUTTERFLY WEED (Asclepias tuberosa) Zone: 4-9 Height: 1 to 2 feet Bloom time: June through September Flower color: Bright orange to yellow-orange One of the biggest factors in the decline of monarch butterflies is the increasing scarcity of milkweed, its only caterpillar host plant. In addition to being a vital food source for the larval stage of monarchs, many other butterflies and nectar seekers will flock to this plant. FOOTHILL PENSTEMON (Penstemon heterophyllus) Zone: 6-10 Height: 1 to 1 1/2 feet Bloom time: May through July Flower color: Blue, purple This California native is a good choice for attracting butterflies, bees, and hummingbirds. Well-suited for Mediterranean-climate and low-water gardens, rocky slopes or hillsides. JOE PYE WEED (Eutrochium maculatum) Zone: 3-8 Height: 6 to 8 feet Bloom time: July to September Flower color: Purple, pink The large vanilla-scented flower clusters tower well above other perennials in the late-summer garden. They attract big showy butterflies, such as monarchs and swallowtails, along with many native bees and other insects. LANCELEAF COREOPSIS (Coreopsis lanceolata) Zone: 4-9 Height: 1 to 2 feet Bloom time: May to July Flower color: Yellow This dependable and prolific flowering native perennial is a common component of pollinator gardens and native wildflower mixes and provides early-season food for bees and butterflies. PICA BELLA CONEFLOWER (Echinacea ‘Pica bella’) Zone: 3-8 Height: 1 ½ to 3 feet Bloom time: June to September Flower color: Dark pink with orange-brown centers Of the many coneflower varieties, ‘Pica Bella’ is one of the best for pollinators, according to Todd Jacobson, head of horticulture at The Morton Arboretum. The the open flower form of the native species provides an ideal feeding platform for monarchs and swallowtails. Other insect pollinators will also feast on these long-blooming beauties. SHOWY GOLDENROD (Solidago speciosa) Zone: 3-8 Height: 3 to 6 feet Bloom time: July to September Flower color: Yellow Goldenrods are among the most important late-season pollinator plants, according to 100 Plants to Feed the Bees. Honeybees visit them in droves prior to winter to collect their nectar, and other bees use the pollen to provision late-season nests. |
For more variety in your pollinator garden, see 10 Perennials for Pollinators, Top 10 Shrubs for Pollinators and 10 Annuals for Pollinators from Proven Winners.
10 TIPS FOR STARTING A POLLINATOR GARDEN
10 TIPS FOR STARTING A POLLINATOR GARDEN
- Plant native plants: Native plants are more attractive to local pollinators than imported or hybridized plants because because the plants and native pollinators have evolved together. Native plants are also easier to establish and will not require the use of pesticides. If you can only find a cultivated variety, choose one closest to the natural form of the native plant. Learn more: Native Plants: How & Why to Grow a Native Plant Garden.
- Choose plants with varying bloom times: Use a combination of plants that will bloom from early spring to fall. Providing a consistent food source will keep pollinators returning to your garden all season long.
- Include a variety of plants: Include a diverse array of flower colors, fragrances, heights, and shapes to attract different pollinator species. Flowers in shades of blue, purple, white, and yellow are better to attract bees. Red, yellow, orange, pink, and purple blooms are better for attracting butterflies. (See: Flowers for a Bee-Friendly Garden, and 25 Butterfly Garden Plants)
- Avoid double-flowered varieties: Double-flowered plant species make it difficult for pollinators to reach the nectar.
- Plant multiples of each plant: Arrange your plants into groups. Flowers planted in masses will lure in more pollinators than a scattering of individual plants throughout the garden.
- Make room for larval host plants: This can be difficult, because you have to accept that these plants will be eaten by butterfly caterpillars. Plant them in an area that is out of direct sight so the damaged plants won't affect the overall look of the garden. (See: Butterfly Larval Host Plant List from Penn State Extension Service)
- Choose a sunny spot: Collecting nectar and spreading pollen is arduous work. Locate your pollinator patch in a spot that gets ample sunlight, since many pollinators are energized by the warmth of the sun. Also provide rocks to serve as warming and resting spots.
- Create safe watering areas: Place rocks in shallow water to provide a spot for pollinators to land and drink water safely. A plant saucer or shallow bird bath work well.
- Provide safe havens: Encourage pollinators to visit your garden by providing natural or man-made nesting sites. Bumblebees and many solitary bees nest in the ground and need open patches of bare soil. Dead wood, such as hollow logs and tree stumps, provide nesting areas and shelter for bees, wasps, and beetles. Bee and insect houses also provide nesting sites and can be purchased; or you can build your own by drilling holes approximately ¼ inch in diameter and 3 inches deep into blocks of untreated wood or using pre-made nesting tubes.
- Avoid pesticides: Any use of pesticides should be avoided as much as possible. If you must use one, choose the least toxic and spray at night when pollinators are less active.
When planting pollinator plants it's always a good idea to check with your local Extension Service. Click here for resources!
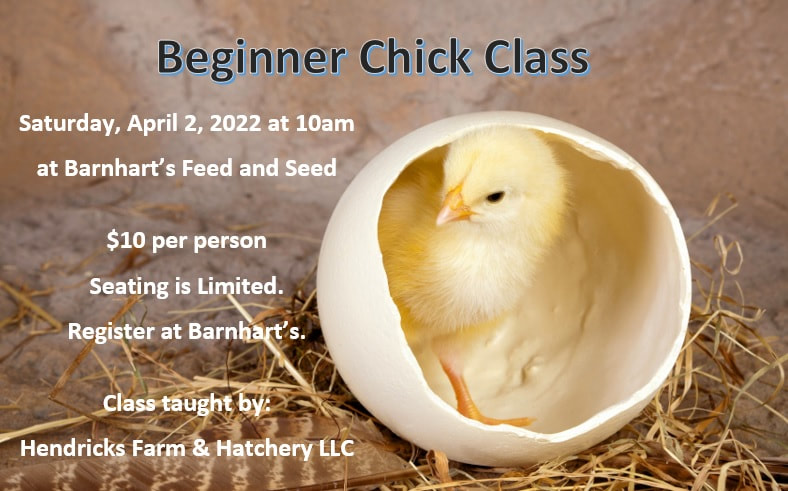
Wanting to raise chicks and don't know where to start? Tried to start chicks and feel like you need help? Come join us as we learn more about chicks!
We will be discussing (1) baby chick care requirements, (2) integrating chicks into existing flocks, (3) cost-effective methods to keep chickens, (4) time & resource requirements, and (5) frequently asked chicken questions.
In addition, we will have a drawing at the end, where one lucky attendee will win a FREE $5 gift certificate redeemable for a local chick.
Register here at Barnharts Feed and Seed. The class will be held here in the feed shed.
Ticket required for children 12 and up. Younger children are welcome to attend as long as the parents feel they can listen and learn and are not a distraction to the class.
Questions? Come by or call 706-804-2461
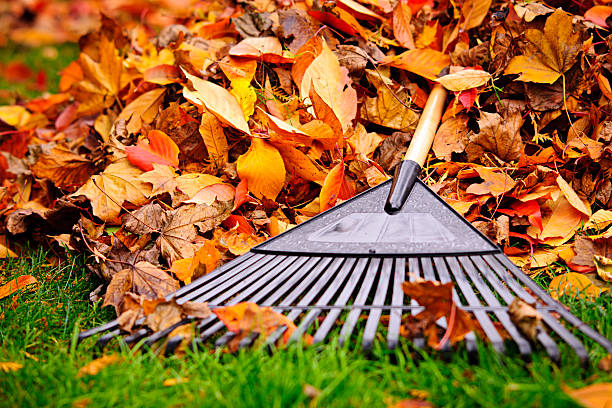
Raking leaves this weekend? Look at every leaf as gardener’s gold! Here are awesome ways to make the most of this abundant annual windfall—from protecting plants to making leaf mold and mulching. Nature builds soil this way—and so can you!
LEAVES ARE FALL’S MOST ABUNDANT CROPYes, LEAVES are this season’s most abundant crop. What amazing organic matter! And free, too. The trees have mined minerals from deep in the subsoil and bought them to the surface. Leaves are a rich source of calcium, magnesium, phosphorus, potassium, and more. The leaves of one large tree can be worth as much as $50 worth of plant food and humus. Pound for pound, leaves contain twice the mineral content of manure. The huge amount of organic matter they offer can be used to improve soil structure.
Note: If you do not have a yard of leaves: Many communities make compost from the leaves that residents drop off at dumps and transfer stations; the larger towns and cities hold leaf- and yard-waste collections! I’ve just finished spreading a pickup load of my town’s leaf compost in my vegetable garden.
Here’s how to use those fall leaves to feed your soil instead of stuffing nature’s leaves into plastic garbage bags to be dumped by the millions into landfills.
1. IMPROVE YOUR SOILMix shredded leaves right into your garden. Next spring, your soil will be teeming with earthworms and other beneficial organisms. Note: If you add shredded leaves right to the soil, add some slow-release nitrogen fertilizers to help the leaves decompose and to ensure that soil microbes don’t use all of the available nitrogen.
Join Ben and his furry friend who shows us all the ways to use fallen leaves in the yard and garden, putting all their goodness to use around the garden, from protecting plants to making leaf mold and mulching. Hang around to the end for a great way to supercharge all the leaves you do rake up!
2. CREATE A COMPOST PILE
Make compost for a valuable soil amendment. If you are not already composting, now is a good time to start. Pile autumn leaves in the corner of your yard. Ideally, keep leaves from blowing away with chicken wire or some type of structure. To speed up composition, shred those leaves with a mulching lawnmower (or use a chipper or leaf shredder).
Layer these carbon-rich “brown” leaves with high-nitrogen “green” material such a grass clippings, dead plant matter, and kitchen scraps. The “green” feeds the bacteria that will be doing all the work of breaking down the leaves. Layer three or four inches of old leaves with an inch of fresh grass clippings or other green, leafy yard waste.
Then let the compost sit all winter, turning the pile occasionally to aerate it. If the compost pile starts to appear dry, spray it down with a garden hose and turn with pitch fork. By the time spring rolls around, you should have some nice compost to mix into your garden soil.
3. MAKE LEAF MOLD
Composting sound like too much work? Then make leaf mold, much beloved by English gardeners. Simply rake the leaves into a big pile. If you shred them, they will decompose faster, but you can still make leaf mold without shredding. Keep the leaves moist let the fungi take over. After one to three years, the leaves will have disintegrated into a dark, sweet-smelling, soil conditioner that is high in calcium and magnesium and retains water. It’s exceptional as an amendment for veggie and flower gardens and a great addition for potting soils.
4. MAKE MULCHLeaves make an excellent protective mulch for vegetable crops, blueberries (and other berries), and ornamental shrubs. They not only suppress weeds and help retain soil moisture, but because they contain no weed seeds themselves, they won’t encourage the spread of new weeds.
We cover the beds in our vegetable garden with a layer of chopped leaves to keep the soil from washing away over the winter. Be sure to chop or shred leaves before using them as mulch. Whole leaves can form a mat that water can’t penetrate.
Leaves make a good insulating cover for overwintering tender perennials, too. The best time to mulch perennials is after the ground has frozen, so put aside shredded leaves in bags to use later in the fall. Leaf cover allows fall-planted garlic to root without sprouting, and prevents shallow-rooted strawberries from heaving during winter’s freeze-thaw cycles.
5. MOW INTO LAWNResearchers at Michigan State University have shown that lawns actually benefit from a thin layers of leaves. Leaf litter improves the soil, lessening the need for fertilizer in the spring. They recommend a mulching lawnmower with a blade 3 inches high and mowing once a week while the leaves are falling. This will break down the leaves into smaller pieces over the winter, providing your soil with nutrients. Older mowers can be converted to mulchers by installing a mulching blade. So, don’t be a perfectionist! Leave leaf litter to feed worms, fungi, and soil bacteria. Just don’t leave thick layers of matted leaves on your lawn, as this blocks oxygen to the soil and invites disease.
6. PROTECT AND STORE ROOT VEGETABLESLeaves make a good insulating layer for cold-hardy vegetables and root crops stored in the ground—such as carrots, kale, leeks and beets. Cover them and you’ll be able to harvest all winter.
If you have a cool, humid spot, you can also store carrots, beets, and other root vegetables between layers of crisp, freshly fallen leaves. Sprinkle each layer of leaves with water (don’t let them get soggy). If you don’t grow your own vegetables, visit a farmers’ market and try to find a vendor who will sell you half a bushel or more of your favorite root crops.
7. LEAVE LEAVES FOR WILDLIFELeaves aren’t just about being useful to us as humans. Fallen leaves also provide wildlife, especially pollinators, with some winter cover. Bees, moths, butterflies, snails, spiders, and dozens of arthropods and pollinators overwinter in dead plant material for protection from cold weather and predators. For example, the mated queen bumble bees burrow only an inch or two into the earth to hibernate for winter, relying on natural leaf litter to keep them insulated. Also, many butterflies overwinter as chrysalises or cocoons disguised as dry leaves. (Be careful when you throw away leaves!)
No need to rake, mow, and blow away a bit of nature that is essential to our natural web of life. Consider creating a leaf pile or two and allowing it to break down naturally. (Leave leaves whole; do not shred.) Leave leaves on your garden beds as mulch through the winter and don’t be in a rush to remove in the early spring. (Don’t worry; flowers have no trouble poking their heads through leaves.) Your butterflies and pollinators will thank you!
8. HAVE FUN! My siblings, friends, and I used to have tons of fun leaping around in the big leaf piles we’d rake from our lawns each fall. Back in those days, our dads touched off the leaf piles in the late afternoon, and we roasted potatoes and apples while the giant piles burned to ash. Most jurisdictions rightly prohibit open leaf-burning these days to reduce air pollution, but the smell of a burning leaf still triggers powerful memories of those idyllic days.
Original article from The Old Farmers Almanac https://www.almanac.com/what-do-fall-leaves#
LEAVES ARE FALL’S MOST ABUNDANT CROPYes, LEAVES are this season’s most abundant crop. What amazing organic matter! And free, too. The trees have mined minerals from deep in the subsoil and bought them to the surface. Leaves are a rich source of calcium, magnesium, phosphorus, potassium, and more. The leaves of one large tree can be worth as much as $50 worth of plant food and humus. Pound for pound, leaves contain twice the mineral content of manure. The huge amount of organic matter they offer can be used to improve soil structure.
- Leaf humus can lighten heavy clay soils.
- They feed earthworms and beneficial microbes.
- Leaves increase the moisture retention of dry, sandy soils.
- They make an attractive mulch in the flower garden.
- They are a fabulous source of carbon to balance the nitrogen in your compost pile.
- They insulate tender plants from cold.
Note: If you do not have a yard of leaves: Many communities make compost from the leaves that residents drop off at dumps and transfer stations; the larger towns and cities hold leaf- and yard-waste collections! I’ve just finished spreading a pickup load of my town’s leaf compost in my vegetable garden.
Here’s how to use those fall leaves to feed your soil instead of stuffing nature’s leaves into plastic garbage bags to be dumped by the millions into landfills.
1. IMPROVE YOUR SOILMix shredded leaves right into your garden. Next spring, your soil will be teeming with earthworms and other beneficial organisms. Note: If you add shredded leaves right to the soil, add some slow-release nitrogen fertilizers to help the leaves decompose and to ensure that soil microbes don’t use all of the available nitrogen.
Join Ben and his furry friend who shows us all the ways to use fallen leaves in the yard and garden, putting all their goodness to use around the garden, from protecting plants to making leaf mold and mulching. Hang around to the end for a great way to supercharge all the leaves you do rake up!
2. CREATE A COMPOST PILE
Make compost for a valuable soil amendment. If you are not already composting, now is a good time to start. Pile autumn leaves in the corner of your yard. Ideally, keep leaves from blowing away with chicken wire or some type of structure. To speed up composition, shred those leaves with a mulching lawnmower (or use a chipper or leaf shredder).
Layer these carbon-rich “brown” leaves with high-nitrogen “green” material such a grass clippings, dead plant matter, and kitchen scraps. The “green” feeds the bacteria that will be doing all the work of breaking down the leaves. Layer three or four inches of old leaves with an inch of fresh grass clippings or other green, leafy yard waste.
Then let the compost sit all winter, turning the pile occasionally to aerate it. If the compost pile starts to appear dry, spray it down with a garden hose and turn with pitch fork. By the time spring rolls around, you should have some nice compost to mix into your garden soil.
3. MAKE LEAF MOLD
Composting sound like too much work? Then make leaf mold, much beloved by English gardeners. Simply rake the leaves into a big pile. If you shred them, they will decompose faster, but you can still make leaf mold without shredding. Keep the leaves moist let the fungi take over. After one to three years, the leaves will have disintegrated into a dark, sweet-smelling, soil conditioner that is high in calcium and magnesium and retains water. It’s exceptional as an amendment for veggie and flower gardens and a great addition for potting soils.
4. MAKE MULCHLeaves make an excellent protective mulch for vegetable crops, blueberries (and other berries), and ornamental shrubs. They not only suppress weeds and help retain soil moisture, but because they contain no weed seeds themselves, they won’t encourage the spread of new weeds.
We cover the beds in our vegetable garden with a layer of chopped leaves to keep the soil from washing away over the winter. Be sure to chop or shred leaves before using them as mulch. Whole leaves can form a mat that water can’t penetrate.
Leaves make a good insulating cover for overwintering tender perennials, too. The best time to mulch perennials is after the ground has frozen, so put aside shredded leaves in bags to use later in the fall. Leaf cover allows fall-planted garlic to root without sprouting, and prevents shallow-rooted strawberries from heaving during winter’s freeze-thaw cycles.
5. MOW INTO LAWNResearchers at Michigan State University have shown that lawns actually benefit from a thin layers of leaves. Leaf litter improves the soil, lessening the need for fertilizer in the spring. They recommend a mulching lawnmower with a blade 3 inches high and mowing once a week while the leaves are falling. This will break down the leaves into smaller pieces over the winter, providing your soil with nutrients. Older mowers can be converted to mulchers by installing a mulching blade. So, don’t be a perfectionist! Leave leaf litter to feed worms, fungi, and soil bacteria. Just don’t leave thick layers of matted leaves on your lawn, as this blocks oxygen to the soil and invites disease.
6. PROTECT AND STORE ROOT VEGETABLESLeaves make a good insulating layer for cold-hardy vegetables and root crops stored in the ground—such as carrots, kale, leeks and beets. Cover them and you’ll be able to harvest all winter.
If you have a cool, humid spot, you can also store carrots, beets, and other root vegetables between layers of crisp, freshly fallen leaves. Sprinkle each layer of leaves with water (don’t let them get soggy). If you don’t grow your own vegetables, visit a farmers’ market and try to find a vendor who will sell you half a bushel or more of your favorite root crops.
7. LEAVE LEAVES FOR WILDLIFELeaves aren’t just about being useful to us as humans. Fallen leaves also provide wildlife, especially pollinators, with some winter cover. Bees, moths, butterflies, snails, spiders, and dozens of arthropods and pollinators overwinter in dead plant material for protection from cold weather and predators. For example, the mated queen bumble bees burrow only an inch or two into the earth to hibernate for winter, relying on natural leaf litter to keep them insulated. Also, many butterflies overwinter as chrysalises or cocoons disguised as dry leaves. (Be careful when you throw away leaves!)
No need to rake, mow, and blow away a bit of nature that is essential to our natural web of life. Consider creating a leaf pile or two and allowing it to break down naturally. (Leave leaves whole; do not shred.) Leave leaves on your garden beds as mulch through the winter and don’t be in a rush to remove in the early spring. (Don’t worry; flowers have no trouble poking their heads through leaves.) Your butterflies and pollinators will thank you!
8. HAVE FUN! My siblings, friends, and I used to have tons of fun leaping around in the big leaf piles we’d rake from our lawns each fall. Back in those days, our dads touched off the leaf piles in the late afternoon, and we roasted potatoes and apples while the giant piles burned to ash. Most jurisdictions rightly prohibit open leaf-burning these days to reduce air pollution, but the smell of a burning leaf still triggers powerful memories of those idyllic days.
Original article from The Old Farmers Almanac https://www.almanac.com/what-do-fall-leaves#
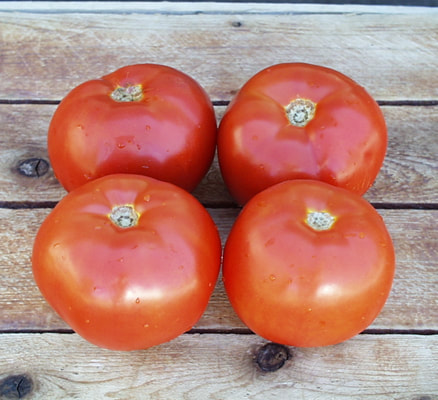
How do you know when fruits and vegetables are at their peak ripeness?
Here's a great guide from the The Old Farmers Almanac to help you out.
Here's a great guide from the The Old Farmers Almanac to help you out.
Here is a listing of celestial events you might want to look for during these spring nights in May. All times are listed as Eastern Daylight Time for the Northern Hemisphere.
Take note that we sometimes will use angular degrees to define the separation between two objects, such as (for example) the Moon and a bright planet. Keep in mind that the width of your clenched fist, held at arm’s length, measures roughly 10°.
May 12—Venus is a rather difficult sight as May begins, setting only 45 minutes after the Sun for viewers at mid-northern latitudes. However, the planet’s visibility improves considerably during the month. By May 31st, Venus’s altitude at sunset has increased from 8° to 14° and the bright world doesn’t set until about 1 hour 25 minutes after sundown. Soon after sunset this evening, an exceptionally thin (1 percent illuminated) lunar crescent might be glimpsed about 1° to the lower left of Venus.
May 13 – This evening, it’s Mercury’s turn to be visited by the Moon. It’s still an extremely slender (4 percent illuminated) crescent when it appears about 3° to the left of Mercury. They’re low in the west-northwest at dusk, setting before the sky is fully dark.
May 15--This evening, Mars can be found at nightfall, sitting about 1¾-degrees to the upper left of the waxing crescent Moon. Mars is in Gemini, fairly high in the west at dusk, 11° below Pollux and Castor. It passes 5° south (lower left) of Pollux on May 31st. In a telescope, the Red Planet is a featureless little dot. It now glows only 1/53 as bright as it did last October!
May 17--Today Mercury reaches “greatest elongation,” 22° east of the Sun, and is visible in a completely dark sky. This rocky little world is now only half as bright as was at the start of the month, and its tiny disk is only 35 percent lit. The planet fades much more rapidly in the following days, becoming too faint to observe by May 25th. It will arrive at inferior conjunction with the Sun on June 10th.
May 19 – First Quarter Moon at 3:12 p.m. In this phase, the Moon looks like a half-Moon in the sky. One-half of the Moon is illuminated by direct sunlight while the illuminated part is increasing, on its way to becoming a full Moon.
May 26 – May’s Flower Moon turns 100% full at 7:14 a.m. In this phase, the visible Moon is fully illuminated by direct sunlight. Though the Moon is only technically in this phase for a few seconds, it is considered “full” for the entire day of the event and appears full for three days.
Supermoon Alert! Because perigee (the closest the Moon comes in its orbit to Earth for the month) occurs the night before at 9:55 p.m., at a distance of 222,023 miles, we are calling this full Moon a “Supermoon,” the second and last for 2021 (April’s was the first). This will lead to an unusually large range of tides during the next few days.
There will also be a total lunar eclipse this morning, that will be best seen from the western half of the United States just before sunrise.
Lunar eclipses are known for turning the Moon a reddish color, which some refer to as a “Blood Moon.” The reddish color will be visible everywhere where the total phase will be visible (where the Moon is above the horizon during the total phase of the eclipse). That means the Western US will get a good sight of it. In the Eastern half of the country, unfortunately, the Moon will set prior to totality, so we miss out.
May 29—Mercury Retrograde begins (ends June 21). The term retrograde comes from the Latin word retrogradus, which literally means, “backward step.”
May 31 –Set your alarms! Early risers will enjoy seeing the waning gibbous Moon just 5½° to the lower left of Saturn during the predawn hours.
Our schedule is adapted from “Skylog,” a regular feature appearing in Natural History magazine, written by Mr. Rao since 1995.
This post was re-used from the farmers almanac. See full post HERE.
 RSS Feed